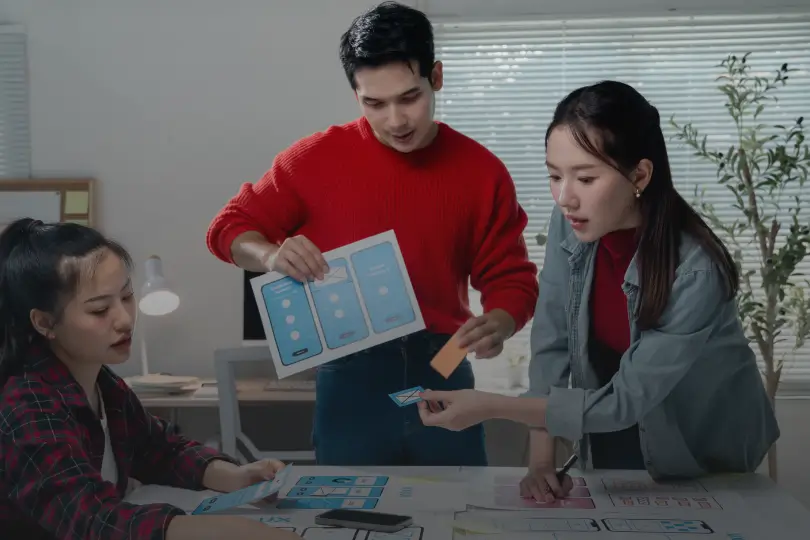
Simple Steps To Create An Amazing Walk Cycle Animation
For millions of years in millions of homes, a man loved a woman, a child then was born. It learned how to hurt and it learned how to cry. Like humans do.
When I look at these lines from David Byrne’s classic, it reminds me of a character I first designed to animate, and how I helped it walk. Like humans do.
Back in the times, when resources used to be scarce, to get animations to work was a challenge. Mere observation of an effect was never enough to try to replicate it.
For example, you could get your digital character to animate by fixing it’s bones and pivoting them intricately. But if you did not know that while you walk, your height keeps changing, your animation would never look natural.
Didn’t expect that, did you?
But if you did not know that while you walk, your height keeps changing, your animation would never look natural.
Which is why designers, animators, and motion graphic artists need to be great observers first and foremost. If they are also armed with useful chapters on physics and maths, it helps. It REALLY helps. You cannot get those balls bounce off surfaces realistically ever. EVER.
That was me reaching crescendo of my passion twice in under one minute, ONE. Guess, it’s time to sip a glass of orange juice and get back to work:
Let’s get going on how to get this walk cycle animation done:
Walking in itself might be an ordinary and the most basic human function, but it is vital to set your foundations right in the field of animation with this basic animation. Interestingly, there are going to be some easy 3d work you will do, or at least for the viewers it ‘ll seem. From creating a contact position to refining the walk cycle, an animator should be aware of how to go on with the process. Today, I shall help you on how you can start with an easy process for an amazing walk cycle animation.
There is no ticket to this zoo you call ‘world’ for its humans are free to watch!
What is a Walk Cycle Animation?
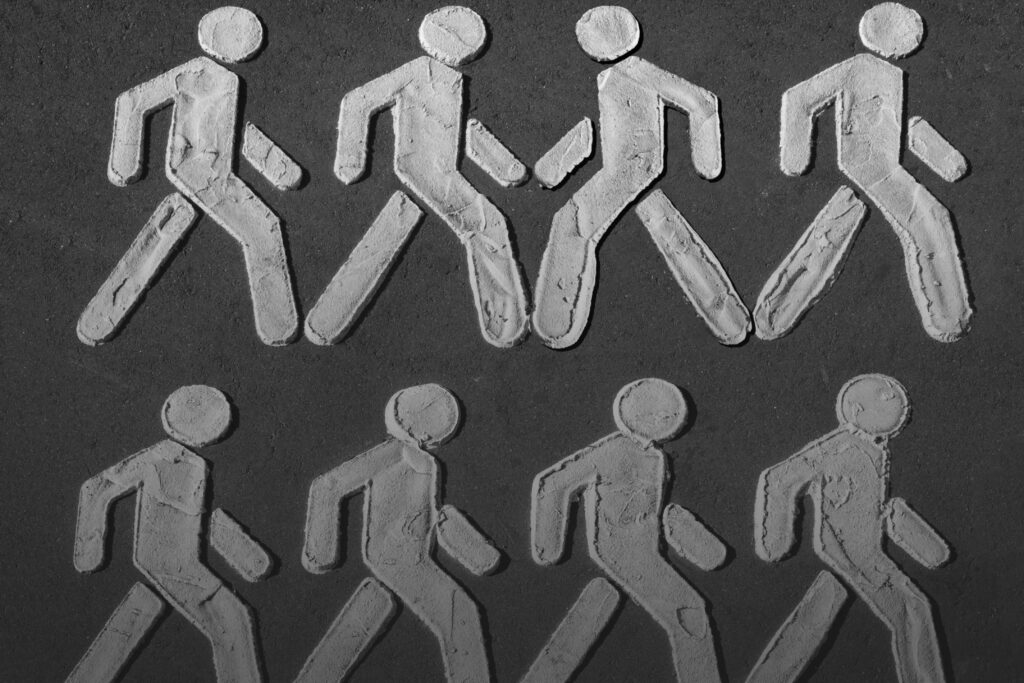
A walk cycle is a simple animation technique done digitally. A sense of movement can be simulated in a character created by you by putting a series of digital illustrations in frames (timeline) to use. Eventually, it shall give the effect of walking movement to the animated figure.
It is an essential part of animation as it helps in visualizing the basics of human movement. Making it look natural is our goal. A character walk-cycle conveys much more than the movement of a character such as their gait, walking pace, and body language.
From 2D, and 3D to cartoon creation, these illustrations have found their purpose in a variety of animation practices. However, the only requirement for a UI/UX designer is to know the basics, whether you’re working with 2D sketches or 3D digital models. More so helpful for motion graphic artists, and definitely interesting for any artist to check this out as a beginner’s guide into animation.
Steps to Make a Seamless Walk Cycle Animation
The thumb rule to create a walk cycle animation easily is by practice. Let’s begin with easy animation steps:
1. Do a Proper Research
This is the age of information, though I like to believe we have evolved beyond that. But that’s a topic for another day.
So to get started, you go googling. How humans walk. You can get an idea or outline of the style of animation you aim to recreate. Taking inspiration from a fellow animator or artist’s video can help especially in eliminating errors especially if you are not much in practice or comfortable with tools.
This step is the step of observation.
Observe essential factors such as how the hips rotate, how the chest needs to move, why the weight is centered, how the weight shifts from one leg to another, how to emphasise on the propelling force of the trailing leg to push you forward done naturally etc.
You can also use keywords like “how humans walk”, “human walking movements” to explore they physics of walking. I can help you with some videos directly here:
Kevin Kirby’s video on phases of human walking is a fine place to observe the different stances in walking. Once you check it out, the world will never be the same again.
I would encourage you to check out different styles of walking. One of which is how to do it right with your heels on. This one would help observe some interesting points:
What comes next is pretty cool since you get to work on your character’s costumes and bodies, but before jumping on to that, explore time observing people. There is no ticket to this zoo you call ‘world’ for its humans are free to watch!

2. Create a Character
After taking ideas from different sources of the style of animation, take the next step by sketching the character. Beginners can keep it simple for the first time as per the size of their choice. However, while creating a walk cycle animation, it is better to keep the frame rate between 24 to 25 frames per second. I’d go with 24, I side with the experienced ones on this one.
So choose your character, plan the costumes, and sketch on to prepare to start your journey towards your goal.

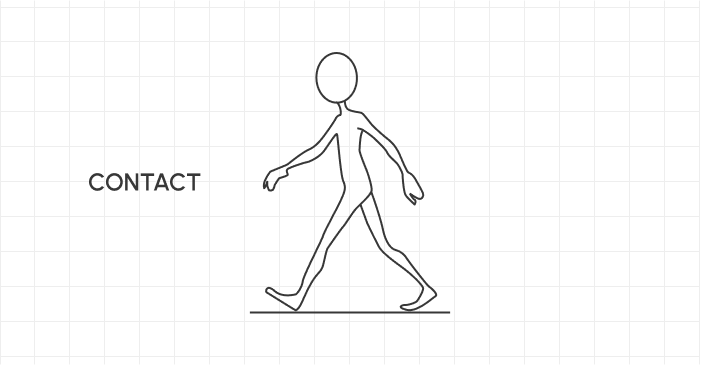
3. Create Contact Position
This is the very foundation of a walk cycle animation and sets the base for how the character’s walk would look with every step it takes. With the character’s feet hitting the ground as they walk or move forward, a contact position would decide how the front leg and back leg should be placed.
Before it all begins to get boring, let me smack you with some poorly done animations but really well explained idea about humans, their walk, and the story how walking changed with shoes:
And yeah, if you had not stumbled upon this video in your step 1 yourself, you can safely assume your dedication in research needs improvement. It was basic, and once it was right before you, you should have been curious enough.
But there is so much right you are doing it, don’t give up. You GOT it!
4. Highlight the Forward Point
The forward point is the position from which any character will start their journey. The back foot will stay firmly on the ground, and the front leg will be bent and then raised on the front side.
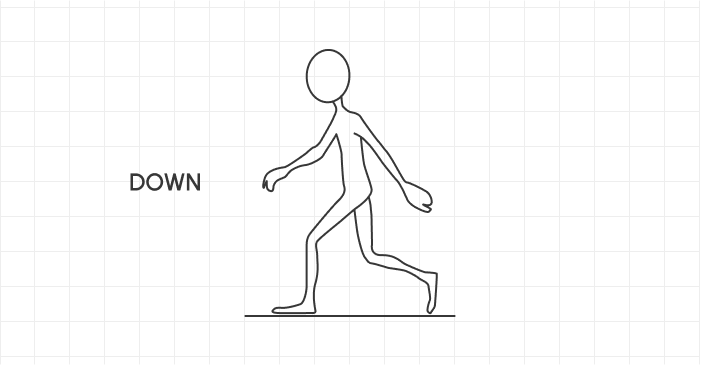
5. Down Position
In the down position, the character’s weight shifts downwards to the contacting foot. This position can be animated by removing the weight and shifting it down and dropping the character’s hips.
6. Create the Passing Position
The next step is adding the passing position or halfway pose where the character’s legs pass each other. While this movement has to be a seamless continuation of the forward point, the main difference is that the weight of the character would shift upwards. The back foot should be lifted while heading forwards as it is off the floor, and the front leg should be heading backward.

7. Designing Up Position or Falling Point of the Walk
The character is now on the highest walking point, meaning that their leg is swinging forward before placing the foot on the ground to hold. The character should be leaning forward and the heel should be partially lifted to adjust its weight. Repeat steps 3, 4, 5, and 6 for designing another leg.

8. Game of Balances – Upper and Lower Portions of the Body
Adjust the up-and-down parameter to balance the weight of your character. Visualize the movement of your character and reflect them in your animation such as the hips moving and adjusting the curves to balance out the overall body weight.
9. What if your body was a wave, from a side to another side?
Upon refining the upper and lower body weight, it is time to refine the side-to-side movement. Adjust the curves on your graph editor and ensure that the spacing is right. Place the hips above the foot that is planted on the ground. Keep the character’s knees bent, rotate the hips, and their feet should absorb the impact as they hit the ground.
10. No, chests ain’t plateaus that don’t move.
The upper body of your character can convey a lot about your personality. To keep it natural, ensure that the chest movements are simple. If your character has broad chest rotations, it is a reflection of the subject’s attitude. While making your arms move, make sure that the chest moves along with it too because nobody moves with a still chest.
11. Ignore not knees. Kneel, and fix the Popping of the Knees
After working on the upper portion of the body, it is time to focus on the issues in the legs. The popping of the knees can be avoided by stretching the leg or shrinking it. The feet also need to be fluttered, and to achieve that it has to be raised between one or two frames. To eliminate the popping of the knees, adjust the hip control.
12. Crossover Again
This time, reverse the crossover process so that the character ends their walk cycle in the same position in which they started. Remember to make changes to the head, arms, and other body parts for the second movement.
13. Fine-tune the Walk Cycle
Lastly, make sure to check ways in which you can polish your walk cycle animation by taking it to the next level. Check on the following factors:
- Enhance the animation by adding fine details in the character’s motion
- Maintain consistency in contact points
- Consider how weight affects gait
- Add drags in the fingers and head
- Create a personality by altering parts of the walk cycle
- Verify all arcs of the feet and hand
Wrap Up
Though creating a human walk cycle animation might be slightly difficult, once you get the hang of it, you will be able to ace the game. Post your first walk, you will enjoy the freedom you get to add your alterations and brush it up until you master it. The exciting part is that you can even add different moods and situations so that the character speaks for itself and is able to engage your audience effortlessly.
Not all humans walk the same, but they are humans very sane. Remember Captain Jack Sparrow? Don’t you exit this space without cheering yourself with this walk
And as far as today’s quota of ‘Things NOT to do’ list, it’s the animation in this video you need NOT attempt!
Are you ready to animate your walk cycle? For more creative ideas on UI/UX designing, stay in touch!
About Us: Algoworks is a B2B IT firm providing end-to-end product development services. Operating chiefly from its California office, Algoworks is reputed for its partnership with Fortune 500 companies such as Amazon, Dell, Salesforce, and Microsoft. Algoworks is an expert in UI/UX Designs with experience catering to enterprises belonging to all domains. This includes: Brand Strategy, Product Design, UX Research, UI & Animation and Design Testing. For more information, contact us here.